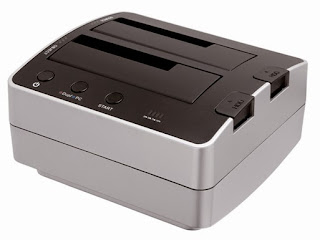
The plan was to replace the existing OCZ Vertex 3 120GB SSD with an OCZ Vector 180GB SSD. I had tried cloning the disc while installed in the PC but I could not get the Free Acronis software supplied with the replacement SSD to install so I decided to use a Freecom Hard Drive Dock Duplicator...
The beauty of this piece of kit is, it does not have to be connected to a computer and you do not need any software to clone a disc. WARNING always backup your data before paying around with a HDD. See my comment at the end of this post.
Instructions
Carefully remove the drive you want to clone from your computer, beware of static, ground yourself before starting. Make sure the Duplicator is switched off. Place your old SSD in the Duplicator slot marked Source and the New SSD in to the slot marked Target. Press the On/Off switch to turn the Duplicator On, then hold down the Dup/PC switch for 4 seconds, this should now be Red, press the Start button. The tiny LED's along side each drive will flash and then turn Blue. The Progress Bar on the right below the Freecom badge will be Blue, these count down the progress of the data transfer, when the bar reaches 100% the transfer is complete. I waited for the Dup button to turn Blue as the Freecom imply that it will, but it doesn't. It took me a couple of hours to transfer 140GB. Turn the Duplicator Off and use the eject button to remove your New SSD.
Reinstall the New SSD in your computer, again beware of static. All being well your computer should reboot as normal only FASTER. Go into Start and type Partition in the search box. One of the options to appear will be "Create and Format Hard Disc Partitions" Click this and the Disc Management Window will open. If the your original SSD was smaller than the New SSD you will notice that only part of the new SSD is active. The disc has effectively been partitioned. Unbelievably the Windows Disc Manager will not allow you to enlarge the active partition to utilise all the disc space. The simple solution is to use a piece of Free software called AOMEI Partition Assistant Standard Edition. Follow the instructions on on how to resize a partition at SSDHDD.org. The general opinion is that this piece of software works without any risk of damaging the disc. Read the reviews here. I have to say it worked a treat.
