As I mentioned in a previous post I had my Dremel 3000 for about 3 years but in that time it had probably only had about 30 minutes use if that. This time it was a problem with the Shaft Lock, the button you press to stop the shaft turning so that you can remove or unlock the Collet/Chuck attachment. When I pressed the blue button the lock would slip as soon as I applied any turning force to slacken the Chuck/Collet.
Dismantling the Dremel, no difficult if you have done it once before. See my previous post for a link to the teardown or click here to see a YouTube video showing how to dismantle the Dremel 3000 and replace the Shaft Locking Pin. Please note the video refers to removing the screws that hold the body together but it does not mention that they are "Torx "screws.
I ordered the replacement parts on eBay from here.
Showing posts with label fix. Show all posts
Showing posts with label fix. Show all posts
03/05/2019
23/02/2016
Samsung Smart TV does not play USB Video - Fix
I have a Samsung Smart TV Model UE22D5003 which I discovered to my disappointment would not play video from a USB Flash drive, only music and photos.
I am most grateful to a thread on AVForums for the fix:-
I am delighted to say it worked for me at the second try. I think you need to press the buttons fairly quickly for it to work.
Here are some shots of the set-up screen that opens when you follow the above instructions.


I am most grateful to a thread on AVForums for the fix:-
There is an easy solution to fix this problem:
-With the TV in STAND-BY Mode press the following keys in sequence in the remote: Info, Menu, Mute and Power on the TV.
- The TV shows the service menu, find the menu OPTION, press Enter> Factory Reset, scroll down to MODEL press Enter then Right or Left buttons to see the various model numbers until you get to UD5800. Press POWER button. See images below
And voilà! Yo can play videosTurn TV on, change Source to USB and you should now have a Video option
I am delighted to say it worked for me at the second try. I think you need to press the buttons fairly quickly for it to work.
Here are some shots of the set-up screen that opens when you follow the above instructions.

This is the first screen to appear
PRESS OK for Option

Scroll down till you get to Model

Use L and R buttons to search for UD5800
Press POWER button
15/12/2014
This computer is not running genuine Windows - My Solution - Updated
Have you had a warning that your Windows 7 operating system is not valid? (I think you can also get this message with W8) See screen grabs below. If so this may be a Windows update problem. If you follow the links it leas to a page offering you a genuine copy of Windows for a fee! Which looks like a Microsoft ransom scam to me. I know my Windows version is legit so what is going on. I think it is to do with the last Windows Update I installed. If you get this message I would suggest that you make sure you have the latest Windows Update installed. Reboot using a Rescue Disc (you know you should have one cuz they work, make one now) or from the Windows CD if you have one. Some PC's and Laptops have a rescue or recovery option on the hard disc which can be activated by pressing an Function key. Your original instructions should tell you which F key. There are other options but this one worked for me.


To make a system repair disc, click the "Start Button" and type System Repair in the search box, click "Create a System Repair Disc" option and follow the instructions. You will need a blank CD to hand.
UPDATE - 15.12.14: My celebrations were premature. The pop-up returned. I am working on it and will post a further update when I have a solution.
UPDATE 2 - 17.12:14 If all else fails try the simple approach. This is the solution posted on the Microsoft website... and it worked, I think...
To activate by using a direct connection
Open Windows Activation by clicking the Start button, right-clicking Computer, clicking Properties, and then clicking Activate Windows now.
If Windows detects an Internet connection, click Activate Windows online now. Administrator permission required If you're prompted for an administrator password or confirmation, type the password or provide confirmation.NB if Windows detects that your copy of Windows is valid this may be as far as you need to go. If your activation time has expired it may be necessary to enter the product key as below.
Type your Windows 7 product key when prompted, click Next, and then follow the instructions.
First message screen...
2nd screen, seen if you click the Resolve option...
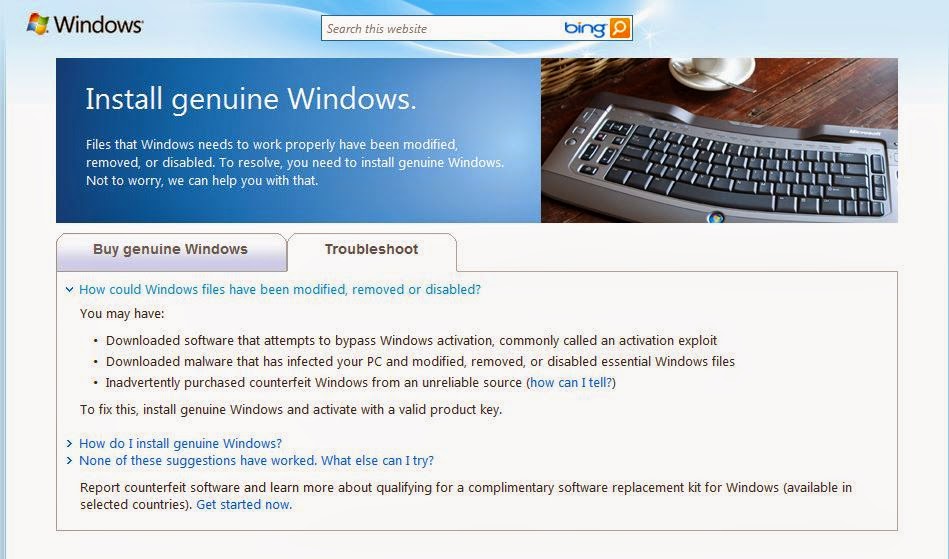
3rd screen shows "Buy Genuine Windows" tab when it opens, this is the "Troubleshoot" option...
If your Windows activation period has expired your computer functionality will be reduced and the desk top will become black with a permanent message shown in the bottom right-hand corner.
To make a system repair disc, click the "Start Button" and type System Repair in the search box, click "Create a System Repair Disc" option and follow the instructions. You will need a blank CD to hand.
08/01/2014
iPhone 4s Weak Wifi Reception Fix
The wifi signal on my iPhone 4S had been getting worse and worse. At first I thought this was just the distance from my router, but at the same location in the house the reception on my iPad was still 4 bars and on my phone 2 or 1. A web search revealed that deterioration in WiFi reception was a known issue with the iPhone 4S. A couple of articles and forum posts suggested that this was due to an internal screw loosening off.
As my iPhone 4S is coming up for changing and is out of warranty I thought I would have a go at fixing the problem following the suggestions in these various articles.
WARNING:- opening your iPhone will invalidate your warranty so think carefully before you start fiddling.
Fixing the problem involves removing the back and tightening the relevant screw. A simple job one would think. Nothing about an Apple product is ever simple. The back is held in place by 2 pentalobe tamper resistant screws. The chance of have the appropriate screw driver in your kit is remote. They look like a Tork screw but they are quite different. I purchased a kit from Maplins at a cost of £6.99 but you can buy iPhone 4S tool kits on the Internet from a variety of source including Amazon. Warning do not attempt this job without the correct tools.
The first link I found gives a step by step photo sequence for removing the back and getting access tpo the screw in question but unfortunately the most important shot of the screw is misleading, there is no screw! So I have added the image below which clearly shows to screw that needs to be tightened.
IMPORTANT: it is very easy to damage the pentalobe screw slots so be VERY careful when removing and replacing any screw. Make sure the tip of the screw driver is full engaged in the slot. It is also easy to strip threads so do not over-tighten.
Instructions for removing the back of the phone link.

It is a good idea to check the tightness of all the screws you can see. In my phone they were all slightly loose.
NOTE: If you experience wifi problems after having a screen replaced you may find that this screw could be missing completely or more likely the small metal contact that is underneath the screw is missing, see the photo below.

If you want to swap your pentalobe screws for Phillips screws or if you have a problem removing or replacing the pentalobe screws see this article in IFIXIT. Link
Article updated 2.2.14
28/09/2013
Broken Earphone Jack Removal from iPad or iPhone
My iPad slipped off the bed the other day and landed on the earphone jack (Apple Earphones) snapping it off flush with the iPad case. The problem was now how to get the broken jack out of the socket? This is my fix.
There was the vestige of the centre core protruding but not enough to catch hold of. I discovered that the plastic remaining in the socket could be levered out with the tip of a craft knife or you could use a pin to remove the top plastic ring insulating ring of the jack left in the socket. For my fix to work you have to remove this bit of plastic. You maybe able to shake it out or hook it out with the bent tip of a pin.

There was the vestige of the centre core protruding but not enough to catch hold of. I discovered that the plastic remaining in the socket could be levered out with the tip of a craft knife or you could use a pin to remove the top plastic ring insulating ring of the jack left in the socket. For my fix to work you have to remove this bit of plastic. You maybe able to shake it out or hook it out with the bent tip of a pin.
Materials
- Pin
- Satay stick, wooden kebab skewer or similar piece of soft wood to fit in jack socket.
- Super Glue

04/04/2012
Dell Monitor Power Button Failure
The power (on/off) button on my Dell 2407 WFP-HC monitor failed, fortunately in the ON position. Despite the monitor being about 8 years old it works perfectly well and I had no intentions of trashing it, so was it fixable? Lo and behold first Google search result was a YouTube video, in 4 parts, of how to repair the power button on a Dell 2407 WFP monitor by thinkofwhy.
I would advise watching all 4 videos before starting. Watch out where he mentions removing the stand and rear cover in part 4. Removing the rear cover will make the removal of the circuit board that holds the switches much easier and its replacement. It is important to replace the button in the correct orientation, that is with the line vertical. Before I got to dismantling my monitor I discovered that if I used a blob of Blue Tack pressed on the button and turned the button to the correct orientation I could operate the button.
The problem is if your button fails in the OFF position you will not be able to watch these videos. From the number of comments on the video's this is a common problem with this and other Dell monitors so even if yours is working ok check these instructions out before it is too late.
Part 2
Part 3
Part 4
31/01/2012
Word 2022 Endnote Numbering Problem
If you are a skinflint like me and refuse to upgrade to the latest version of Windows Office you may find this workaround for a notorious Word 2002 bug helpful.
If you add Footnotes or Endnotes to a document and then delete one or more you will probably find the numbering goes bananas. I have tried every fix on the internet to sort it but only one works for me.
Make your Endnote changes and save the document. use Ctrl+A to select the whole document, then Ctrl+C to copy. Open a NEW document (the page layout is not important) Ctrl+V to paste the document. You should note that the Endnote numbering is now correct. Ctrl+A to select this modified document. Go back to the original document which should still show that it is Selected, if not Ctrl+A again and then Ctrl+C to past in the modified document. Check that your modification has worked, if so Save. Best of luck!
Subscribe to:
Posts (Atom)