If
you think your computer is free from viruses, malware, adware etc you
may be living in a fools paradise. I pride myself on running a clean
computer. After a few strange browser crashes today I decided to follow
the advice in the attached video. To say I was surprised at what this
clean-up revealed would be an understatement. Britec 09 is a well
trusted source of info, check out your system NOW, you maybe surprised what you find...
The video demonstrates how to use a free program called UVK.
This free program is available as a portable version which can be used from a USB drive even if your computer is infected with malware virus, trojans, worms and real nasty bootkit. Britec09 will show you how to remove these using UVK.
Have
you ever booked a Ryanair flight and been stuffed by what appears to be
their compulsory travel insurance? There are a number of postings on the Internet offering solutions to this problem but they all seem to be out of date as Ryanair has changed their page layout. Here is the solution I discovered.
Ryanair has constructed its ticket
sales architecture in such a way as to make it difficult for occasional
users to avoid buying overpriced insurance. Well here is how to avoid
it... When you get to the Travel Insurance section: Click on the
"Country of Residence" box and look for the strange country called
"Don't Insure Me" between Denmark and Finland and select this option! See the photograph below.
There are so many reasons why you would not want to fly Ryanair, this is just one of many. If you want a few more reasons check out the travel blog of Marie-Eve Vallieres at "To Europe & Beyond".
The wifi signal on my iPhone 4S had been getting worse and worse. At first I thought this was just the distance from my router, but at the same location in the house the reception on my iPad was still 4 bars and on my phone 2 or 1. A web search revealed that deterioration in WiFi reception was a known issue with the iPhone 4S. A couple of articles and forum posts suggested that this was due to an internal screw loosening off.
As my iPhone 4S is coming up for changing and is out of warranty I thought I would have a go at fixing the problem following the suggestions in these various articles.
WARNING:- opening your iPhone will invalidate your warranty so think carefully before you start fiddling.
Fixing the problem involves removing the back and tightening the relevant screw. A simple job one would think. Nothing about an Apple product is ever simple. The back is held in place by 2 pentalobe tamper resistant screws. The chance of have the appropriate screw driver in your kit is remote. They look like a Tork screw but they are quite different. I purchased a kit from Maplins at a cost of £6.99 but you can buy iPhone 4S tool kits on the Internet from a variety of source including Amazon. Warning do not attempt this job without the correct tools.
The first link I found gives a step by step photo sequence for removing the back and getting access tpo the screw in question but unfortunately the most important shot of the screw is misleading, there is no screw! So I have added the image below which clearly shows to screw that needs to be tightened.
IMPORTANT: it is very easy to damage the pentalobe screw slots so be VERY careful when removing and replacing any screw. Make sure the tip of the screw driver is full engaged in the slot. It is also easy to strip threads so do not over-tighten.
Instructions for removing the back of the phone link.
This photo on the left shows the screw you need to tighten. In my phone the metal shield that this screw holds in place was silver not black as here.
It is a good idea to check the tightness of all the screws you can see. In my phone they were all slightly loose.
NOTE: If you experience wifi problems after having a screen replaced you may find that this screw could be missing completely or more likely the small metal contact that is underneath the screw is missing, see the photo below.
If you want to swap your pentalobe screws for Phillips screws or if you have a problem removing or replacing the pentalobe screws see this article in IFIXIT. Link
An area of colour management which seems to cause particular confusion (is there only one?) relate to camera setup. Mainly the questions of, what is the colour gamut of RAW and what colour space should my camera be set to?
The net is awash with information most of which is mind blowing so I am copying here a couple of paragraphs from a website which goes by the name of TheLightroomLab.com. These words made sense to me and as I could not put it better myself I repost them here with due recognition of the origin.
Digital camera raw files do not have a fixed color space because these file’s do not yet contain pixels. Raw files are a record of the unprocessed “sensel” data which exceeds all gamut limits. Flexibility of color, and of color space, is one of the greatest advantages to digital camera raw files. Serious photographers often shoot in raw so that they can pick the appropriate color space for each processed copy of their original capture using post-processing software. Adobe Photoshop Lightroom makes this process completely painless since color space is one of the parameters that we can control, and automate, inside of the Export dialog.
My advice is to keep life simple. I suggest that photographer’s of any level shoot Jpeg images using the sRGB color space. Using sRGB in camera will give you files that can be printed directly off the memory card. If you need more control over color, if a wider gamut will help with your work, then bring home Raw files and learn to use post-processing software like Lightroom or Photoshop
To summarise: I have my camera, a Sony RX100 II, set to shoot jpeg and RAW and the colour space is set to sRGB. Yes a compact, I have given up lugging DSLR's around!
Like many folk these days my main PC main drive (Drive C:) is a Solid State Drive (SSD). Due to the cost of these devices it is tempting to fit a much smaller capacity than a typical mechanical hard drive (HDD), mine SSD is only 120GB. This small size means you have to be very careful about conserving disc space. For example I locate most of my non critical software on a second mechanical hard drive (Drive D:). Drive C: is reserved for the operating system and the likes of Adobe Photoshop. This means that rather sooner than later you will face the "not enough free space" problem no matter how careful you are. Which is the problem I just ran into. I have been quite strict about running the standard Windows 7 Disk Cleanup utility. I have also been careful to delete or relocating any unwanted software.
I followed most of the instructions and managed to release 12 GB of space, that's 10%.
I missed out steps 3 - Turn Off System Restore and 5 - Use Third Party Cleaning Tool. But I will look into these options later.The two steps that seemed to make the biggest difference where steps 2 and 7.
I know cooking is not normally the subject of my blog posts but I think I may have cracked the Yorkshire Pudding bogey that has been blighting my culinary efforts for years! So I need to record the recipe for future reference.
The general principle is copied from here. But like so many recipes there is always a snag, the way that recipe is worded could lead to the wrong amount of flour being used. But as I have a scientists mind the way the ingredients in recipe from the link were proportioned made sense to me. I have rewritten the recipe to make it clearer, hopefully avoiding any possible pitfalls.
Ingredients:-
This sufficient to make about 12 puddings using a standard size muffin tray .
Crack 4 fresh eggs of any size (I used large) into a measuring jug, note the volume and tip into your mixing bowl.
Measure the same volume of skimmed milk and add to mixing bowl. If you use semi-skimmed or whole milk dilute half and half with water. Whisk the eggs and milk together (I did not bother).
Weigh as many grams of plain flour as you had volume (ml) of eggs ie 150 ml eggs = 150 grams flour. Add to the egg and milk using a sieve (don't worry if you don't have a sieve).
Whisk by hand or with an electric whisk until just single cream consistency with no lumps, don't over do it.
Add a half a level teaspoon of salt and optionally, a shake of pepper.
Allow to stand for at least 30 min. Before use add 2 tablespoons (30ml) water and stir in thoroughly.
You can use a 12 portion non-stick muffin tray or a roasting tray about 12x8 inches, 10x10 inches.
Add a teaspoon (5ml) of of Rape oil (this is what I used because it has a high smoke point), light olive oil, sunflower oil or beef dripping to each well or 30 ml oil to roasting tin. Place in oven at 230C, (220C fan oven) until oil/fat is smoking takes about 15 min.
Remove hot tray from oven (CAREFUL). I hold tray over the gas hob to keep oil sizzling hot while I add the batter. Fill each compartment about two thirds to three quarters full.
Immediately return to oven for 25 min. When time is up turn off oven and leave in for another 5 min. Keep warm until served.
Using this method the Yorkshires I produced were voted my best effort ever. I thought so as well!
Prep time = 15min, Resting time = 30 min, Cooking time = 25 min, Total = 1 hr 10 min
My iPad slipped off the bed the other day and landed on the earphone jack (Apple Earphones) snapping it off flush with the iPad case. The problem was now how to get the broken jack out of the socket? This is my fix.
There was the vestige of the centre core protruding but not enough to catch hold of. I discovered that the plastic remaining in the socket could be levered out with the tip of a craft knife or you could use a pin to remove the top plastic ring insulating ring of the jack left in the socket. For my fix to work you have to remove this bit of plastic. You maybe able to shake it out or hook it out with the bent tip of a pin.
Materials
Pin
Satay stick, wooden kebab skewer or similar piece of soft wood to fit in jack socket.
Super Glue
For the next step I used a "Satay Stick", these are square ended wooden skewer/kebab sticks made from a softish bamboo used for Chicken Satay and the like. They are just the right size to fit in the socket hole. Removed the plastic ring to expose the central conductor for the jack, gently press and rotate the Satay stick to make a hole in the centre. Put the tiniest amount of Super Glue into the hole in the stick, dont let it get down the sides of the stick. If it does trim off and have another go. Carfull reinsert the stick into the hole and press for about 10 sec. give another 30 sec to make sure fully stuck and then pull stick straight out. With a bit of luck the result should look like the photo below.
VLC is a free and open source cross-platform multimedia player and
framework that plays most multimedia files as well as DVD, Audio CD,
VCD, and various streaming protocols.
When installing VLC media player it is important to make sure you only download from the main website. Unfortunately VLC media player has become a popular piece of software to bundle with a range of malware and potential malware as I discovered to my cost recently. I managed to corrupt the copy of VLC that I was using and when I tried to reinstall from the original download file I managed to install Spot.do a browser hijacker hiding as a helpful toolbar. There were also other nasties that loaded at the same time. I don't remember where that original download came from but it reinforced the cautionary warning to be careful where you download freeware from even something as popular as VLC media player.Incidentally I managed to clear up the problem using Malwarebytes.
Hence the reason for this post to guide you to the original source download. which can be found here:-
I took my Canon Powershot G12 out of my bag, I turned the camera on the lens partially extended but would not focus, zoom or retract when turned off. On the screen it displayed Lens Error.I had not dropped or banged the camera and it had been working immediately prior to putting in the bag.
I just found a fix. Hold down the shutter release, then turn the camera on. The lens retracted and Bingo now works normally. This fix may work for other camera in the G range.
The last time that happened on a G9 it cost £250 to repair via insurance.
Maintaining an Excel spreadsheet of computer files can help you keep
track of important business documents or images. Unfortunately,
Microsoft Excel doesn't include a one-step method for importing a file
list from Windows Explorer, but Windows 7 offers an easy workaround.
Using the Command Prompt, you can tell Windows to output a text document
containing a directory list. This text document can then be imported
into Excel and modified just like any other spreadsheet. Link back to original post...
Step 1
Press "Win-E" to open Windows Explorer and locate the folder for which you need a file list.
Step 2
Hold the "Shift" key, right-click the folder and
select "Open Command Window Here." This only works with folders, not
libraries. Libraries point to a specific folder, so select the folder
located under the library icon. If the library points to a drive,
right-click the drive letter from the folder tree.
Step 3
Type "dir /b > dirlist.txt" without quotes and
press "Enter." This creates a list containing file names only. To
include file sizes and dates, type "dir > dirlist.txt" instead. To
also include files in sub-directories, type "dir /b /s > dirlist.txt"
to create a list of files with the full directory structure name, such
as "C:\folder\subdirectory\file.txt."
Step 4
Open Microsoft Excel and press "Ctrl-O" to bring up the Open dialog window.
Step 5
Navigate into the folder containing the files [note: this is the folder you right clicked on]. Click
the file type drop-down menu and select "Text Files
(*.prn,*.txt,*.cvs)." Double-click "dirlist.txt" to open it.
Step 6
Click "Finish" in the Text Import Wizard window to use the default options and import the directory list into Excel.
The dirlist.txt file created by his method could also be opened into Word or any text editor.
Photographs scanned from books, magazines and newspapers or photographs from TV screen or projected images often results in an
unsightly interference pattern called moire. This is how to remove the effect in Photoshop.
Go to Filter > Noise > Median.
Use
a radius between 1-3. Typically the higher the quality of the source,
the lower the radius can be. Use your own judgement, but you will
probably find that 3 works well for newspapers, 2 for magazines, and 1
for books.
Go to Image > Image Size and resample to the desired image size and
resolution using the bicubic resampling option.
Make sure you are zoomed to 100% magnification.
Go to Filter > Sharpen > Unsharp Mask.
Exact
settings will depend on the image resolution, but these settings are a
good starting point: Amount 50-100%, Radius 1-3 pixels, Threshold 1-5.
Use your eye as the final judge.
Tips:
If you
still see a pattern after applying the Median filter, try a slight
gaussian blur before resampling. Apply just enough blur to reduce the
pattern.
If you notice halos or glows in the image after using
Unsharp Mask, go to Edit > Fade. Use settings: 50% Opacity, Mode
Luminosity.
I just realised that my spell checker keeps offering American spelling as a correction ie favor instead of favour. The document language was set to English (UK) so why the problem? Apparently you have to set the Proofing language, mine was set to English (US) for some strange reason.
So here is how you change it...
In Word 2010 select the following options from the Ribbon:
Reviewtab >Languagegroup >Languagebutton >Set Proofing Language
In theLanguagedialog, select the language you want to use for spell checking.
In Word 2007,Reviewtab >Proofinggroup >Set Languagewill accomplish the same thing.
The menu layout in Word 2010 is so frustrating at times. I wanted to insert Endnotes before my References, so I made a Section Break [Next Page] but the end notes came at the end of the 2nd section, ie after my Reference Section. After much searching I discovered the answer here.
This is the post which provided the answer, I hope you can follow it...
... make your changes directly in the Footnote and Endnote
dialog, which you can open with the dialog launcher in the bottom right
corner of the Footnotes group on the References tab? Select Endnotes,
select "End of section," select the desired number
format, select Continuous (assuming you're putting them all at the
end), and make sure "Whole document" is selected under "Apply to."
Screen Clip - Footnote Endnote Menu
Finding the answer was a problem because Word 2012 does this differently to previous versions of word and many of the answers that come up are for the older versions.
I have been using Picasa for ages now and it is one of my favourite bits of software. I recently started to use it to upload images from my Canon G9 and G12. I have just realised it is not uploading video files nor is it showing RAW files, which it used to do.
The solution seems to be quite a simple one. I discovered that in Tools> Options> File Type, I did not have the boxes for RAW or Videos checked. Interestingly when you tick the Video box another box appears with the option to select .mov (Quicktime) files as well. I ticked all the relevant boxes and suddenly Picasa is searching all my watched folders for the missing file types, and when I connected my camera it found and downloaded the video files.
No matter how fast or shiny computers might be when they're new, they all seem to get slower over time. My Samsung NC10 netbook running Windows 7 was taking forever to start up so time for a sort out. As a yardstick they reckon if your computer is taking more than 45 secs to boot up there is something seriously wrong, mine was taking nearly 2 minutes.
A quick Google throws up a bunch of useless information most of which is a disguise for selling you some 3rd party software solution. So I started with the Microsoft suggestions "Optimise Windows 7 for Better Performance".
First suggestion is to try the Performance Troubleshooter, which can automatically find and fix problems.
Open the Performance troubleshooter by clicking the Start button , and then clicking Control Panel. In the search box, typetroubleshooter, and then click Troubleshooting. Under System and Security, click Check for performance issues.
I discovered that about 10 programmes were opening at start-up. None was essential, Microsoft hides the essential programmes from view, so I chose the global option to close all. I rebooted as requested and amazingly the NC10 booted in 30 seconds which I call a result.
There are other things you can do, if you are not certain about the security status of your computer you may wish to double check you have no nasties lurking about on you HD. Make sure your ant-virus software is up-to-date and run a full scan. If you don't already have it, upload anti-malware software such as Malwarebytes, get the free version here. If you not up to speed with security software I suggest you have a look at this video by Britec09 on YouTube, this guy knows what he is talking about and there are no catches.
With Microsoft OneNote installed in Windows 7 there is Print to OneNote option in the Printer List. Occasionally this can go missing. Here is a solution.
Repair the Microsoft Office program installation
Close all Office programmes.
Click Start, and then click Run.
Copy and then paste (or type) the following command in the Open box, and then press ENTER:
appwiz.cpl
In the Currently installed programs list,
click the installed version of the 2007 Office program, and then click
Change.
I am using Firefox 17.0.1. My second monitor an AOC 1950W was replaced after developing a fault. Immediately I discovered a problem when using Firefox. Right clicking on a web-page resulted in the Right Click Menu flickering and disappearing making it difficult if not impossible to select a menu item. There was no problem on the main display. Using Chrome on this display there was no problem.
I checked settings were correct and that drivers were up-to-date to no avail. A Google search for "firefox right click menu flickers" produced the following suggestion:-
Try to disable hardware acceleration.
Tools > Options > Advanced > General > Browsing: "Use hardware acceleration when available" .
If disabling hardware acceleration works then check if there is an update available for your graphics display driver.
Untick box and restart Firefox, this solved the problem.
Due to the minefield of legislation covering the copying of propriety media such as DVD's and CD's one has to tread carefully when offering advice in this area. But given the damage that grand and not so grand kids can wreak on DVD's and the like "Backing Up" is no bad idea. I work on the misguided principle that providing such copies are for my own use and I have no intention of passing them on or off for gain or otherwise I feel my actions are justified or at least defensible. There are also occasions that I wish to send copies of my own work to various places and people as part of my art practice and studies so a "How To" reminder is in order. For those of a nervous disposition you ay want to read about the The Digital Millennium Copyright Act - DMCA! This information is available via the website Doom9.netthe guy who runs this very succinct site about all things "Ripping" obviously knows his subject and conveniently brings all the info together in one place, so that's the place to go for more info.
As I "Back Up" DVD's and CD's so infrequently I can never remember what I did last time I did it so I decided on a Blog Post to remind me.
I have tried DVD Decrypter and DVD Shrink, they both seem to do the ripping just fine. If you have problems with encryption or copyright protection then DVD Decrypter is probably the best choice. You can find Guides on how to use this software on Doom9.
Anyone here still using Windows Live Mesh? The service allowed you to synchronize data between multiple PCs years before Microsoft made the switch to SkyDrive as its main synchronization and data hosting service. Microsoft today announced that Windows Live Mesh will be discontinued on February 13, 2013 as a consequence of that shift towards SkyDrive. Part of what made Windows Live Mesh great on Windows and Mac OS X has already been worked into SkyDrive, Microsoft calls that the DNA of Mesh that has been brought over.
Picasa doesn’t automatically include Portable Network Graphics (PNG) images by default. You can however view PNG images in your Picasa photo library and open them in Picasa for editing from the Picasa Photo Viewer application. You can also set PNG images to always open in Picasa Photo Viewer. It just needs a change to the <Preferences>.
How to Open PNG Images in Picasa
Open Picasa.
Click the Tools menu in Picasa and select Options.
Click the File Types tab at the top of the Options window.
Enable PNG image support by clicking the PNG check box and clicking “OK.”
Click the Tools menu and select Configure Photo Viewer.
Click the PNG check box in the Photo Viewer Configuration window to open all PNGs in the Picasa Photo Viewer by default, if desired, and click “OK.”
If Picasa does not update missing PNG files automatically, add PNG files to your Picasa library by clicking the File menu and selecting Add File to Picasa or Add Folder to Picasa. Picasa also automatically adds to your library PNG images in folders it’s already watching.
I recently installed a new keyboard and mouse, a Microsoft Wireless 5000. The first thing I noticed was the scroll wheel on the mouse seemed to have a mind of its own. But most annoying was that the scroll wheel did not work at all with some programmes, namely Picasa, a programme I use quite frequently. After fiddling with the settings I still could not solve the problem. There were lots of posts on the net about this problem but no solutions. I eventually came across the suggestion of changing the mouse to a different type in the configuration. I chose "Standard Wireless Optical Mouse", see the screen grab below. hen go to the "Wheel Button" drop down menu and choose auto-scroll. The mouse and scroll button now works perfectly with Picasa.
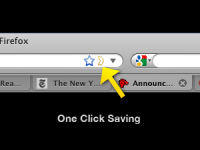
I use Firefox browser and invariably have loads of tabs open for pages I intend to read later or just that I just want to remember. The important ones I tag with Delicious but for the rest I usually end up closing them down and then inevitably as soon as I do that I need to look at one. Firefox has an Add-On called Read-It-Later also available as an iPhone and Android App as Pocket. With this Add-On you can save web pages to read later with just one click, the icon appears in the URL dialogue as yellow outline chevron. When you have time,
access your reading list from any computer or phone, even without an
internet connection!
You can find the Add-On in the Firefox menu >Tools >Add-Ons (Ctrl-Shift-A)
I will report back when I find out if it helps with my problem.
I started with and iPod Touch then the iPhone arrived and now I have an iPad. Whilst I love the user interface of these products I hate iTunes. I never really got to grips with it when I had the iPod, now I have the other 2 pieces of kit I am totally confused. Why does it have to be so difficult to manage the devices and my PC and my Netbook. I have never been the same since I zapped everything from my iPod just when I thought I had it cracked, my confidence has been shattered.
The power (on/off) button on my Dell 2407 WFP-HC monitor failed, fortunately
in the ON position. Despite the monitor being about 8 years old it works
perfectly well and I had no intentions of trashing it, so was it fixable? Lo
and behold first Google search result was a YouTube video, in 4 parts, of how
to repair the power button on a Dell 2407 WFP monitor by thinkofwhy.
I would advise watching all 4 videos before starting. Watch out where he mentions removing the stand and rear cover in part 4. Removing the rear cover will make the removal of the circuit board that holds the switches much easier and its replacement. It is important to replace the button in the correct orientation, that is with the line vertical. Before I got to dismantling my monitor I discovered that if I used a blob of Blue Tack pressed on the button and turned the button to the correct orientation I could operate the button.
The problem is if your button fails in the OFF position you will not be able to watch these videos. From the number of comments on the video's this is a common problem with this and other Dell monitors so even if yours is working ok check these instructions out before it is too late.
The family album is almost a thing of the past. Now we share photographs by passing round the mobile phone or the camera or if you are a bit more tech savvy you may post the images on Facebook, an Internet image sharing site like Flickr, Photobucket, Shutterfly etc. Or you may even have your own photoblog or website. Other alternatives are Digital Photo Frames, CD's DVD's etc. My son-in-law uses his Playstation and shows his on the TV. Or more likely you have thousands of images on the Hard Drive of you r PC or Laptop which no one will ever get to see.
The only problem with digital storage of photographs is the media is prone to corruption or deterioration or obsolescence! How may sorts of storage media have there been in your lifetime. How many more will there be in our kids or grandkids time?
In my opinion there is nothing like looking through a photo album. I am luck enough to have albums created by my grandfather who was a photographer in the early 1900's and my by my mother who was an avid snapper. She had the forethought to go through all her albums and notate the photographs with names, dates and places, which was fantastically helpful when I started on some family history research.
So what are the options? I decided two years ago to start putting photobooks together. I started by collecting together photographs of my 5 grandchildren. I used them to create a photobook for parents and grandparents as a present at Christmas. I am delighted to say that they went down a treat, everyone was delighted. Particularly the grandchildren who constantly refer back to them with great pleasure.
I use Blurb, you have two choices for creating your books an on-line publisher or a downloadable publisher, Both are easy to use and can be configured to be either simple to professional quality with various options in between. The site contains loads of help, videos, tutorials etc. You can stop and start making your book, it is saved automatically and can be alterer right up until you place your order. If you do find a mistake or want to change something you can re-edit at any time.The finished books are excellent quality paper and feel and look like a professionally made book. Check out the website and have a go.
Picasa, my favourite freebie photo editing software just had a major facelift. Picasa version 3.9 is now available to download or as an upgrade. I surprised to find a whole host of new goodies plus a few irritations, mainly changes to layout.
First the good stuff, there is increased connectivity with the net. A big green button for sharing on Google+, 24 new effects for twiddling your images and side by side editing, updated raw support. Also support for WebP is a new image format that provides lossless and lossy compression for
images on the web.
On the irritating side they have moved some of the buttons off the toolbar at the bottom of the page, Movie and Collage in particular. Movie is changed its name to Video and is accessed through the Create drop-down menu. Or you can reinstate the Video (Movie) and the Collage buttons by going to Tools> Configure buttons> and use the Add option to place these buttons back where they belong. But why do they do these things in the first place? More information from the Picasa website.
If you have never tried Picasa you should, it is more than just a photo editor, it will organise your images, catalogue them, sort out duplicates, prepare images for the web, create movies, slideshows, CD's and much much more. It will never take over from Photoshop but for some jobs it is a whole lot quicker and easier, removing red eye for example.
If you are a skinflint like me and refuse to upgrade to the latest version of Windows Office you may find this workaround for a notorious Word 2002 bug helpful.
If you add Footnotes or Endnotes to a document and then delete one or more you will probably find the numbering goes bananas. I have tried every fix on the internet to sort it but only one works for me.
Make your Endnote changes and save the document. use Ctrl+A to select the whole document, then Ctrl+C to copy. Open a NEW document (the page layout is not important) Ctrl+V to paste the document. You should note that the Endnote numbering is now correct. Ctrl+A to select this modified document. Go back to the original document which should still show that it is Selected, if not Ctrl+A again and then Ctrl+C to past in the modified document. Check that your modification has worked, if so Save. Best of luck!
Always useful at this time of the year, here is the link to my 2009 posting - How to Print Off Google Calendar for the coming year - link Tells you how to print off a month to a page for how ever many months you need, 12 in my case.
I purchased a set of Klipsch S4i head/earphones from Amazon December 2010 for use with my iPod Touch. Not cheap at nearly £90, but amazing performance compared with the crap Apple earphones that came with the iPod. Apart from losing the ear plugs on a regular basis I had no problem with the phones, I eventually replaced these with some cheapo ones from another set of earphones, have not lost one since. All went well until about 3 weeks ago when the volume started having a mind of it's own going up and down without any intervention from me. Also the On/Off button stopped working. Inspection showed a crack in the rubber at the neck of the jackplug, see the photograph.
In my opinion there is a design fault in the moulding of the plug at this point. As you can see there is a indentation in the moulding which goes all the way through to the inner wire. Flexing the cable here impinges directly on the wire almost acting like a guillotine. I am sure that many users wrap the wire around the iPod when not in use. This does put a particular strain on the wire at this vulnerable point. I believe the problem could be solved by eliminating this notch from the moulding at this point thus spreading any bending effect over a larger radius and avoiding the pinching of the wire that the current design imposes.
When I checked my Amazon invoice I had purchased the phones on 7 Dec 2010. I sent off an email to Klipsch via the Amazon website. on 5th Dec 2011. No immediate response, sent a reminder on 8th Dec and received a reply by return from the offices in Ireland saying a reply had been sent but had obviously not reached me. They asked me to send the phones back. Which I did by registered post on 9th Dec. A replacement set of phones turned up on 22nd Dec. So thanks to Amazon and Klipsch.
I have modified my replacement phones by pushing a short length of heat shrink sleeving over the jackplug to protect this weak spot.
When I changed the toner cartridge in my BrotherHL-2250DM printer the toner light stayed on and I could not print. I was not sure if this was because I was trying a compatible toner cartridge for the first time or because I had taken the toner cartridge out without turning the printer off first or a combination of the two! This was the 3rd time I had changed the cartridge, previously I had used Brother cartridges and not had a problem.
A Google search for an answer, found the following procedure suggested for different Brother printers but I thought I would give it a try and BINGO (Housey Housey) it seemed to work.
1. With the replacement cartridge installed. Turn power off
2. Open front cover ie access cover to toner cartidge
3. Hold GO button and turn power on
4. When all 3 lights are lit release and press GO twice
5. All lights should come on
6. With all lights on, press GO 5 times
7. Error light turns red and flashes
8. Close front cover
NOTE: In my case the toner light stayed on but the printer worked, however after a few minutes the toner light went out.*
You can also find instructions on the Ciberdirect website. **
PS. After I have installed a new cartridge I print off the "Printer Settings Page" so I can check how many pages I printed from the previous cartridge. Press the Go
button three times within 2 seconds. The printer will print the current
printer settings page. The cartridges are supposed to be good for 2600
pages, I regularly get over 6000 pages by using "Toner Save Mode" setting and printing "Booklet" option for long documents.
Neevia Document Converter makes it possible for anyone to instantly
convert many of the file formats (doc, docx, xls, ppt..)
that are used daily to PDF or Image.
No need to install anything on your computer. Simply upload the file and select your delivery method.
Click link to for more info or to convert file - link
You have your photograph/painting carefully framed with the cord stretched across the back. How do you locate the hook/hanger at the correct hight to ensure all your frames line up?
You need a picture hanging jig. To locate the exact spot for the nail to hang a frame find a strip of wood longer than the distance from the cord to the top of the frame. Drive a short brad or screw into the end of the strip so the point protrudes just a bit, hang the picture on the head of the brad/screw and holding the strip manoeuvre the picture to where you want to hang it, press the strip against the wall, the point makes a mark on the wall. Use the mark as the reference point for hanging your frame.
The beauty of this technique is if you are hanging multiple frames any variation in cord tension or position of hanger on the frame will be avoided. Just align to the top, bottom or centre line of the frame.
I now use this method of hanging, it avoids trial and error and is so much quicker than all the other methods I have tried.
I am grateful to www.sawdust.com for the original idea. Update: the link no longer works, similar info available on Homestoriesatoz.com
Having upgraded from Vista 64 bit to Windows 7 64 bit I discovered the very useful Snip Tool had disappeared. A quick Google revealed a variety of suggestions. The simplest one was to click on the Start button, bottom left corner and in the Search box, type: - %SystemRoot%\system32\SnippingTool.exe or if you are lazy like me Copy "CtrlC" and Paste "CtrlV" . SnippingTool.exe will apear in the results, right click and select "Pin to Taskbar".
Following an upgrade to Firefox 5.0 I found it difficult to scroll pages, particularly if they contained images. It was as if the page was taking a long time to load. A search of the forums suggested that this has been a problem with Firefox since v3 but not something I had previously experienced. However the solution for me was quite simple. Click on the menu toolbar: Tools>Options>Advanced>General>un-tick "use autoscrolling"! Bingo back to smooth scrolling.
A couple of days ago the facility to open a blank Tab in Firefox 4 stopped working. This particular problem related to the new tab button. Whenever I click on the plus (+) symbol to open a new tab window, nothing seems to be happening. Clicking on File and then on the New Tab option doesn’t opens the new tab. Neither do the Ctrl + T works.
A Google for "Firefox 4 tab problem" suggested that the problem was caused by "Ask Toolbar" being incompatible with Firefox 4! I was not even aware I had the "Ask Toolbar" loaded! A forum thread offered the following solution:-
These are the steps to uninstall the Ask Toolbar from Windows XP, Windows Vista and Windows 7:-
For Windows XP:
Make sure all the Web browsers or there processes are closed.
Go to Start menu and Select “Control panel” and then select “Add/remove Programs”
Search the Ask Toolbar from the list of programs installed (or the program with Ask logo)
Click on Change/Remove to uninstall it.
Windows Vista:
Always close all the instance of Web Browsers or related programs.
Go to the following path Start > Control Panel.
Under Programs icon select “uninstall a Program”
Now Select the “Ask Toolbar” from the list and click on “Uninstall”
Windows 7:
Go to the following path: Start > Control Panel > Programs > Uninstall a Program.
Select the Ask Toolbar from the list of installed programs and right click to Uninstall.
I am pleased to report that the solution worked for me in Windows 7. I have to say when I first looked in the list of programmes I could not find Ask Toolbar. This is because it was listed as "Foxit PDF Creator Toolbar" but it was listed in the Publisher column under Ask.com.
UPDATE: 25th April 2011 - The problem seems to have been resolved by a recent software update.
Since I upgraded to Firefox 4 I have been unable to select from the search box drop-down list
When you attempt a search from the search box on your Google Toolbar it may not allow you to select items from your drop-down list of web history or search suggestions.
As a workaround, try using your keyboard up and down arrows to navigate the drop-down list to select your search history, press return to select.
The program stops responding when you try to open or to save a file in an Office 2002 program, in an Office 2003 program, in an Office 2007 program, or in an Office 2010 program.
You know the scenario, you are dashing to get off to college, the post is about to go or you have been typing for 2 hours and just remembered to save the doc for the first time. You open the save menu and click on a folder and the screen goes pale and you notice those dreaded words in the toolbar, (Not Responding), the program hangs. What do you do other than go and make a cup of tea? While you wait to see what happens!
I have Googled for a solution on a number of occasions but without luck. Today I found this Microsoft Support Article ID: 313937. It seems to have worked. The gist of the solution is making sure you have no "Mapped Network Drives" which are not connecting. See the article for the full story.
What do you do when your USB Memory Stick/Drive is not recognised when you try to read it. Well if it has the only copy of your dissertation the response probably lies somewhere between suicide and mucking your pants! That is what happened to a friend today, can I help, how can I not. Quick Google identified suggested the best option was a command line utility called TestDisk. Long time since I did DOS and stuff. The hard part was finding an idiot proof set of instructions how to use Testdisk! The nearest I ,managed was at SysAdminHell a post titled Awesome Utility: TestDisk. I suggest you download TestDisk and then go to the instructions at SysAdminHell.
I found placing TestDisk on another USB Drive worked best for me. After a bit of trial and nor too much error I managed to get the USB drive to boot. I looks as though the FAT32 Boot sector was corrupt. BEWARE of NOT EJECTING your USB Drives!
The tutorial covers the basics of scanning images for retouching and then goes on to show some basic retouch techniques. One useful tip relates to the use of the History Brush, not something I have ever used but I may after watching this.
Not sure who the the young lady is who gives the tutorial be she is easy to listen to for a change.
If there is one thing guaranteed to start an argument among both computer types and photographers it is image resolution, particularly when it comes to uploading images to the web. Well rather than put my 2 penny worth into the pot I will refer you to an excellent site I came across on the web. Wayne Fulton's has a website that covers the whole subject of scanning and image resolution which he modestly calls "A Few Scanning Tips" it is a whole lot more than that.
There is so much fascinating information on this site I hardly knew where to start. So I chose the 72 dpi debate as this is the one that seems to crop up most frequently. The article you need to read is called "Say No to 72 dpi". Wayne not only talks a good talk he provides visual proof of his arguments as well.
Did you know why you should download images off the internet rather than cut and paste them? I suggest that you have a good look around Waynes site, it is a goldmine of fascinating information.
Other useful websites I came across whist looking for this information are included below.
Had one of those strange occurrences this morning whilst working on my dissertation in Word, I hit the wrong key(s) which keys I have no idea and suddenly I AM TYPING IN CAPS AND NOTHING I DID WOULD TURN IT OFF. WHICH WAS A BIT OF A BALL ACHE AS I WAS FINISHING OFF A DRAFT OF MY DISSERTATION AND ABOUT TO DASH OFF TO A TUTORIAL. Enough of that! I hastily Googled "CAPS LOCKED ON KEYBOARD" and tried the first option in the list. They suggested holding down both shift keys at the same time and count 5 - BINGO it worked!
Here a list of exciting publishers. They produce art books, limited artist editions, zines, comics, posters, chapbooks, original web books, freely accessible online archives, and exhibitions.
When Mozilla installed version 3.6.10 of Firefox today a very irritating background appeared! Not immediately obvious how to remove this. Apparently you need to go to:->
Tools>Add-ons>Themes click the active background to uninstall.
To enter my router WEP password requires numbers and CAPS to be entered. It has driven me crackers entering CAPS when the default is lower case. I discovered the following fix:-
Settings -> General -> Keyboard -> Enable Caps Lock
Once this is enabled, tapping the shift key twice will turn on caps lock. When the caps lock is enabled, it will glow blue.
Brilliant
UPDATE
Not so brilliant, the caps lock will not stay locked as you toggle back and forth between alpha and numeric keyboards, bummer!
However - the simple answer is to enter your WAP password into Notes app and then when you need it cut and paste, simple really. It works for all my other network passwords as well, hooray!)
I normally use the Firefox plug-in DownloadHelper to rip streaming video like YouTube or embedded movies, however occasionally it does not respond to embedded Quicktime movies. Here is a solution.
This only works with Firefox. Open the webpage containing the Quicktime video. On the Firefox toolbar at the top of the screen, click "Tools". Halfway down the page click on the button that says "Page Info". In the menu that opens click on the "Media" tab. Look down the list for the movie. It is possible that the entry will be greyed out, ignore this and highlight the entry. Further down the same page, towards bottom right, click on "Save As" and save the .mov file to wherever you want to store it.
Step 1 Saving the Movie Click on the Tools button on the top of the page, go down and click on "page info"
Step 2 Get set up to download the video A window with tabs will pop up. Click on the Tab marked Media
Step 3 Find the Video and save it You look through the page info box until you find the Video you want. After you have found the video you click save as, enter the name you want it saved as, and save it!
Step 4 Update If you want to download flash games off, like addicting games or anygaming website. All you have to do is download it like if it was a video like i showed and open it with your internet browser. And the best thing is that, when ever you play it, it will be the full screen. enjoy
When using Quicktime viewer in Firefox the control bar at the bottom of the console is usually blacked out and the controls are invisible. Curiously they do show very occasionally. Anyway here is a fix.
1. Right click on the browser icon the main icon on your Desktop of in tool bar not the one at the top left of the browser window. 2. Select properties 3. Go to the compatibility tab 4. Check the box for "Run this program in compatibility mode for:" 5. Make sure it says "Windows XP (Service Pack 2)" in the drop down list. 6. Press "OK" at the bottom 7. Reload Firefox
This solution will allow you to see the normal Quicktime timeline and volume options, etc. when watching a Quicktime video.
Have you ever wanted to print out a list a directory/folder list of files from Windows Explorer, a bit like this:-
There is no simple way to do this in Vista, not sure about Windows 7 but I would be surprised if there was! The answer is to make a couple of tweaks to the registry, not as hard as it may sound and add a couple of files to the Windows directory/folder. There is a thread on the Vista Windows forum, which tells you how and provides the necessary files and registry tweaks, follow this link. It took me about 5 mins to work it out. The outcome will be two addition to the "Context Menu" as you will see from the screen-grab below. The option creates a text file in Notepad which you can view, edit and or print. Why don't Microsoft provide such an option? No don't answer that.
Have you ever had a problem sending a LARGE file to someone. Many email providers have an Max file size that you can send as an attachment. Sending films, PSD files etc can be a nightmare. I came across TransferBIGfiles How does it work? Here are the FAQ answers from the site:-
FAQ's
What is TransferBigFiles? TransferBigFiles is the easiest way to share a bunch of files with friends, family or everybody in the world. There's no registration required to use the website. You can just go to the home page and start uploading some files.
What is the storage limit for my files? TransferBigFiles does not limit the amount of space your account can use on our servers, the only storage limit we have is that your files may not be larger then one (1) gigabyte.
For how long are my files stored? Files are stored for up to 5 days or until the download limit of 20 downloads is reached.
Now is the time of year when my wife reminds me that she needs a new calendar. Being a cheapskate my normal practice is to open Outlook and print off the Outlook calendar, a month to a page, could not be easier.
But I now use Google Calendar to record my diary dates AND AMAZINGLY Google does not offer a way to print off the calendar other than 1 month at a time. Can you believe it.
There are a couple of solutions I found on the net, Wincalendar, being one, but it costs money. I found a workaround on the Google Calendar Forumit did not appear to work with my setup BUT after a bit of fiddling I managed to sort it out. So here is my solution:-
I use Firefox but I think this will work with IE as well.
Open your Google Calendar and set to show 1 month per page and set it to start at January 2010 unless you are reading this next year!
On the right hand side of the Calendar page there is a PRINT icon. When you click this you get a pop up window with a page view of the calendar. Choose the "Save As" option and click.
A further pop up appears with the options "Open With" or "Save File" choose "Save File".
Now the "Download" pop up appears, in my case this shows the calendar to have been downloaded as a PDF file. Right click on this and choose the option "Copy Download Link"
Open a text editor such as Notepad, Right Click and "Paste" you will find a link similar to the one below will appear (Don't Panic) This is the link to print off just January.
To print out the 12 months in one go you need to make a slight change to the link. Look for the numbers that I have highlighted, these are 20091228 and 20100201 you need to change the second one to read 20101231.
Select and Copy the link then paste into your Browser, in my case Firefox, and click. This will open up your default PDF software Acrobat Reader or in my case I use the Firefox PDF plugin Foxit Reader. This should display all 12 months of your calendar. You now can print off the 12 monthly pages.
I have a Samsung NC10 netbook and it is brilliant. The sound however has driven me mad. The speakers are tinny but worst of all the sound was horribly distorted even with earphones. After much fiddling I eventually found the solution. I opened the Realtek Sound Effect Manager in Control Panel. Under the Sound Effect tab there is a Karaoke icon, make sure that there is no X showing in the circle. If there is click to turn off. Set the environment to Padded Cell. Success sound back to normal! Make sure all the equaliser sliders are on Max
If I give you all my secrets about inkjet (image) transfers I shall have to kill you so be warned!
The process of transferring an inkjet image or any similar image, photocopy, magazine picture etc using an acrylic medium has been around for a long time. If you Google any combination of those words you will find loads of stuff. I have listed a few of the links I found useful and or interesting.
I have used inkjet prints both dye and pigmented inks. After much experimentation I settled on a digital inkjet paper sold by Granthams, Blackpool. It is ColourLink Matt Inkjet Paper, single sided 100g (UPDATE - this paper is no longer available from this source, try Jessops Matt 100g). You can use almost any paper to start with. As for the transfer medium, I started off using PVA glue, BQ own brand is cheap. It works well but can be unpredictable. You can try anything which contains acrylic polymers, emulsion paint, acrylic primer/undercoat, gesso, acrylic astists paint etc. I ended up using the Rolls Royce of acrylic ploymers "Goldens Regular Gel (Matte)". It is worth a visit to Goldens website thay have lots of info about acrylic transfer.
You can see some of my transfer artwork on alistairparkerart.com go to Gallery and choose "mixed media"
There is no native means of searching for Unread Mail in Gmail. There is however a workaround. Enter is:unread in the Search Box, this will find all the Unread mail in the Inbox. Simple when you know how.
I am not sure what AVG have done with the latest update to v8.1 but my XP laptop and my Vista64 Desktop will not update. Initially there was a problem with CTF files. I sorted that by deleating the currupt file. The next problem was every time there was an update the machines wanted to restart. Now I have a General Error. I have been around the forums and tried the various fixes suggest to no avail. I have installed and reinstalled again to no avail.
I have used AVG for as long as I can remember and have converted many others to the cause but along with many other, may be this is the time to change.
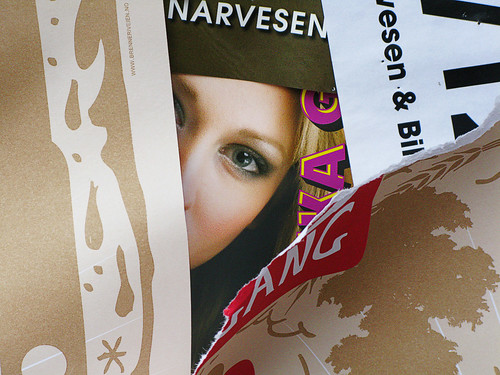
An item in Guardian 12 February 2009 warned that it will be a criminal offence to photograph police officers under anti-terrorism legislation which becomes law on Monday 16th Feb 09. Both professional and amateur photographers will be at risk of harassment under the new law. A major demonstration outside New Scotland Yard is planned for Monday by NUJ.
So I suppose the next time I take a photograph like this my feet won't touch the ground! But does he count? He is probably a civilian, in wolfs clothing!
Spotted on a surveillance job in Trafalgar Square.


